> For the complete documentation index, see [llms.txt](https://docs.cogram.com/llms.txt). Markdown versions of documentation pages are available by appending `.md` to page URLs; this page is available as [Markdown](https://docs.cogram.com/email/emails.md).

# Emails

Integrate Cogram with your email inbox to summarize email threads or draft project reports based on meetings and emails.

Cogram can receive emails from your inbox and use them as source material: summarize a thread, generate a status report, or combine emails with meeting notes into a single project update.

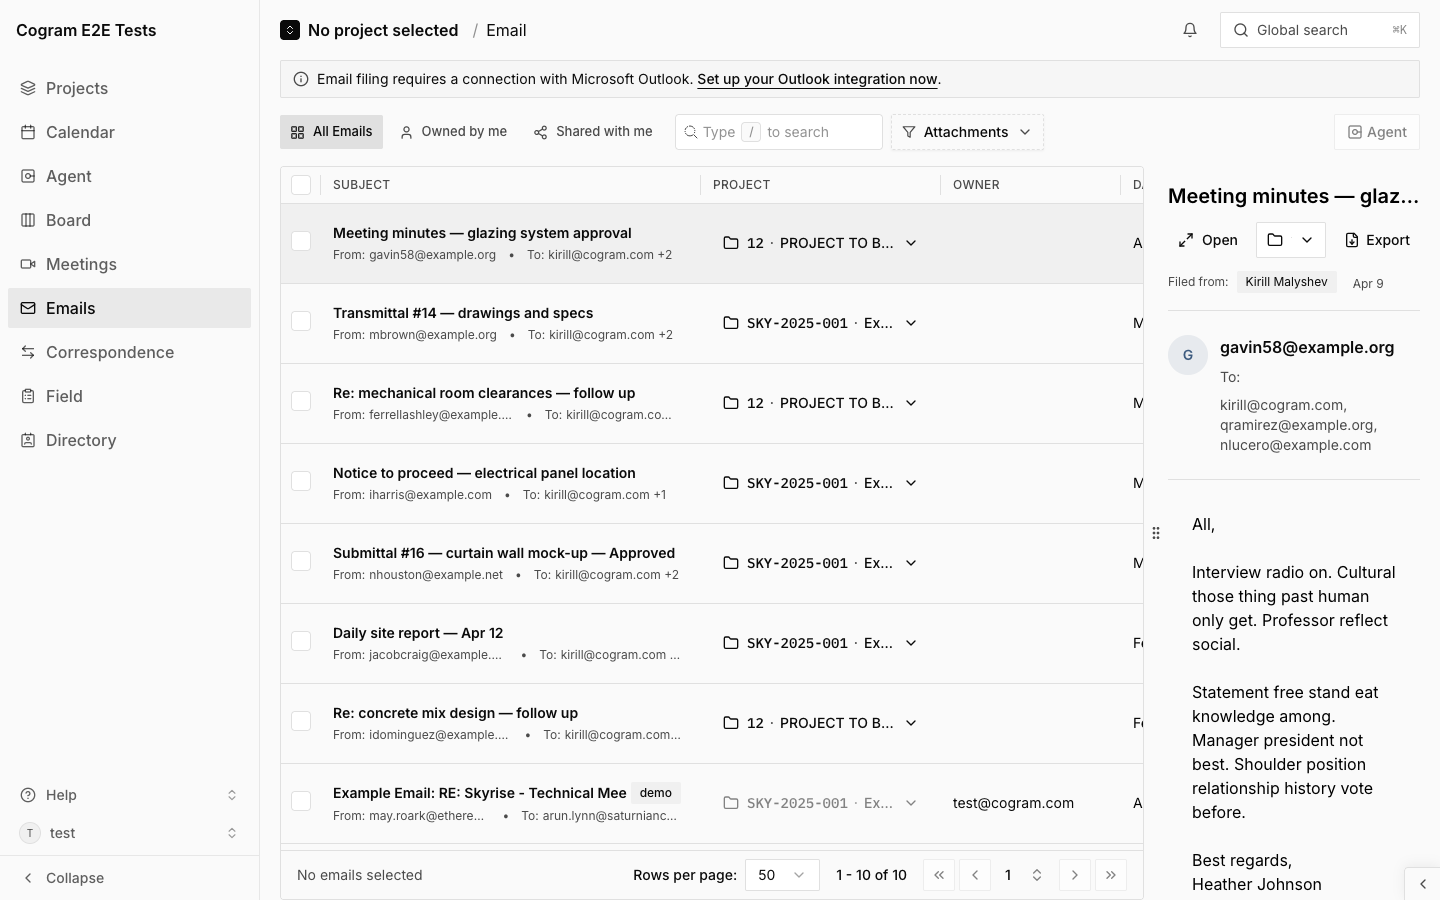
<figure><img src="https://1170756420-files.gitbook.io/~/files/v0/b/gitbook-x-prod.appspot.com/o/spaces%2FxpPm3rHOzFMoBqV20UQl%2Fuploads%2Fgit-blob-6c266938a9b06f1669eabead35ef5cb09fc5fcee%2Femail-inbox.png?alt=media" alt="Filed Emails page showing filed email threads"><figcaption><p>The Filed Emails page in Cogram</p></figcaption></figure>

Emails you send to Cogram are processed securely and are only accessible to members of your Cogram workspace. They are not used to train AI models.

## Receiving Emails in Cogram

To include an email in Cogram, forward the thread to **<assistant@cogram.com>**, or CC <assistant@cogram.com> when composing a new email.

Emails Cogram has received appear under the **Emails** module on the [Filed Emails page](https://app.cogram.com/dashboard/email-inbox), where you can see the subject, sender, and date for each received thread.

The Emails module has two tabs: **Email** (your filed inbox, described on this page) and **Transmittals** (sending files with tracked delivery, described below).

## Sending files (Transmittals)

To send drawings, specifications, or other documents to anyone (inside or outside Cogram) with a tracked record of what was sent and to whom, use **Send Files**. Each send creates a **transmittal**: the project record of that file transfer. Transmittals are also part of the document register — what each one pins, stamps, and freezes is covered in [Transmittals](https://docs.cogram.com/documents/document-transmittals.md).

1. Open the [Emails page](https://app.cogram.com/dashboard/email-inbox) or the [Transmittals tab](https://app.cogram.com/dashboard/email-inbox/transfers) and click **Send Files**.
2. Follow the composer steps: add details, attach documents, pick recipients from your [Directory](https://docs.cogram.com/projects/directory.md), then review and send.

Recipients get an email with a secure link to view and download the files. No Cogram account is required to receive a transmittal. The transmittal record tracks delivery and acknowledgment on the [Transmittals tab](https://app.cogram.com/dashboard/email-inbox/transfers).

### Adding a recipient after sending

If someone was missed, you can send an already-sent transmittal to additional people:

1. Open the transmittal from the [Transmittals tab](https://app.cogram.com/dashboard/email-inbox/transfers).
2. Click **Send to…**, add the recipients, and optionally include a message.
3. Click **Send**. The transmittal's files are included automatically, and each new recipient appears as a new send in the transmittal's **Thread**.

There is no resend action for someone who already received the transmittal. To send the same package again to an existing recipient, create a new transmittal.

### Viewing a transmittal's history

Open a sent transmittal from the [Transmittals tab](https://app.cogram.com/dashboard/email-inbox/transfers). Its **Thread** shows the full history: every send, including recipients added later, plus when each recipient viewed, downloaded, or acknowledged the files.

## Enabling auto-forwarding (Outlook)

Instead of forwarding emails one by one, you can create an Outlook rule to automatically forward matching emails to Cogram:

1. Open Outlook and go to the **Home** tab.
2. Select **Rules** > **Manage Rules & Alerts**.
3. In the **Rules and Alerts** dialog, click **New Rule**.
4. Choose **Apply rule on messages I receive**, then click **Next**.
5. Check the criteria you want (e.g., messages from a specific sender or containing certain words) and click **Next**.
6. When asked what to do with the messages, select **forward it to people or public group**.
7. Click the underlined "people or public group" link, enter **<assistant@cogram.com>**, and click **OK**.
8. Click **Next**, optionally add any exceptions, then click **Finish** to finalize the rule.

Matching emails now forward to **<assistant@cogram.com>** automatically.

## Working with multiple emails

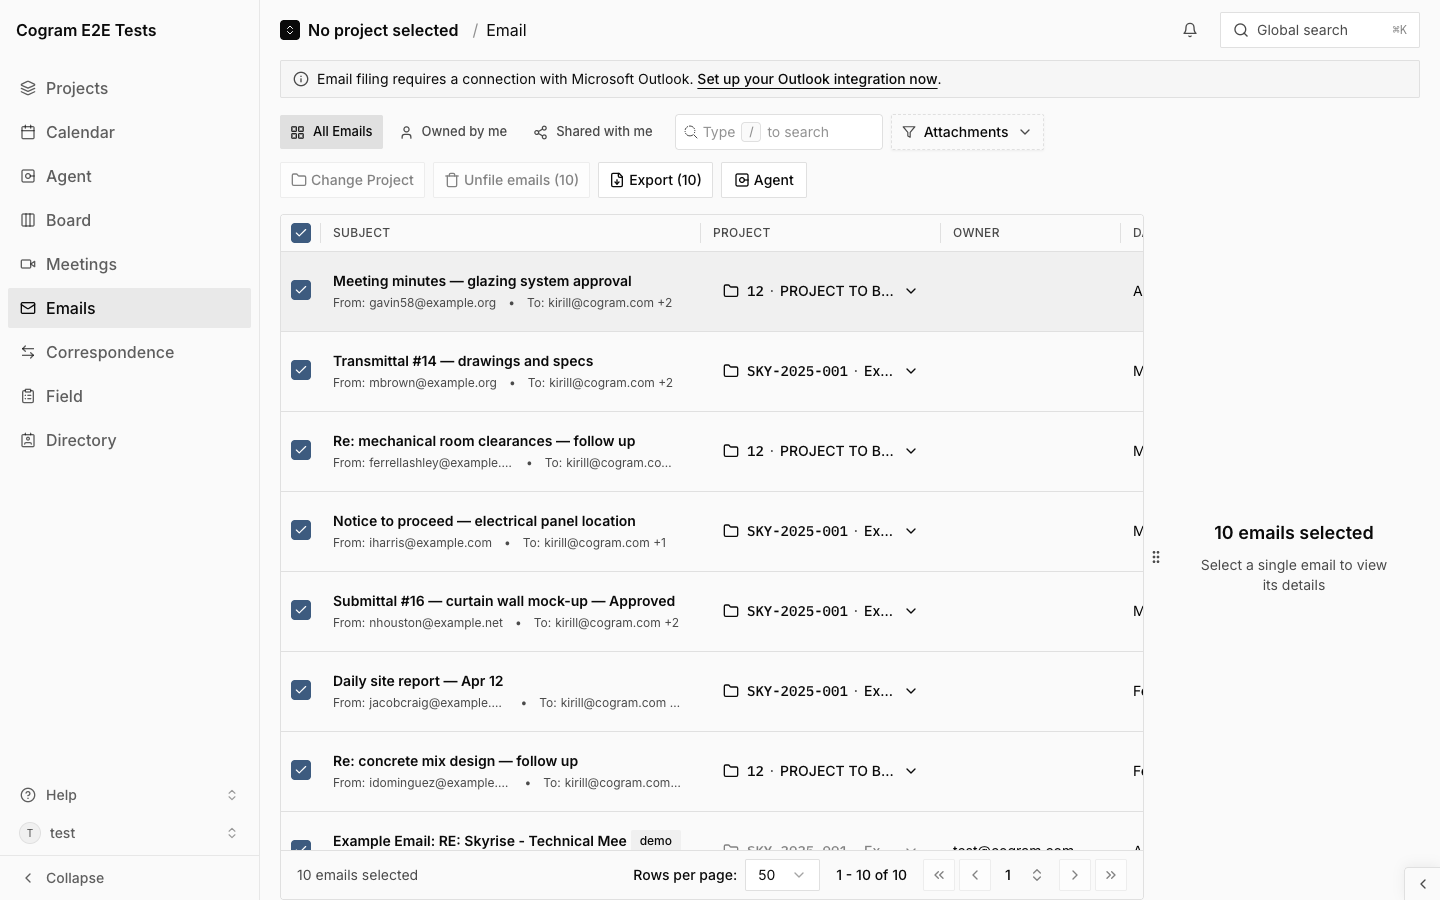
On the Filed Emails page, you can select multiple emails at once to perform bulk actions. Click the checkbox on any email row to start a selection, and a bulk action toolbar appears at the top of the list.

<figure><img src="https://1170756420-files.gitbook.io/~/files/v0/b/gitbook-x-prod.appspot.com/o/spaces%2FxpPm3rHOzFMoBqV20UQl%2Fuploads%2Fgit-blob-b9b59b68cfae3430a161935e3ace9e226c04f4ab%2Femail-multiselect.png?alt=media" alt="Filed Emails page with emails selected and a bulk action toolbar showing Change Project, Unfile emails, Export, and Agent buttons"><figcaption><p>Selecting multiple emails reveals bulk actions</p></figcaption></figure>

| Action                | What it does                                                                                                                                                                                                                                        |
| --------------------- | --------------------------------------------------------------------------------------------------------------------------------------------------------------------------------------------------------------------------------------------------- |
| **Change Project**    | Reassign all selected emails to a different project.                                                                                                                                                                                                |
| **Unfile emails (N)** | Remove the selected emails from their projects. The count of selected emails is shown in parentheses.                                                                                                                                               |
| **Export (N)**        | Download the selected emails as `.eml`, `.msg (Outlook)`, or `.pdf` files in a ZIP archive. To export a single email, open it and select **Export** in the email header. See [Exporting emails](https://docs.cogram.com/email/exporting-emails.md). |
| **Agent**             | Open the AI agent with all selected emails as context, useful for generating a combined summary or report across multiple threads.                                                                                                                  |

To select all emails on the current page at once, click the checkbox in the column header.

## Hiding the preview pane

The [Emails page](https://app.cogram.com/dashboard/email-inbox) shows the selected email in a preview pane beside the list. To use the full width for the list instead, hide the pane. An email then opens on its own page when you click it.

1. Open [Account settings > Integrations](https://app.cogram.com/dashboard/settings/account-settings/integrations#email).
2. Under **Email**, turn off **Show preview pane**.

Admins set the default for the organization under [Organization settings > Emails > Emails page](https://app.cogram.com/dashboard/settings/admin/email#emails-page), with **Show email preview pane**. Select the lock next to the switch to apply the choice to everyone. A locked switch is disabled in your account settings.

## Opening and replying in Outlook

From the Emails page you can jump back to the original message in Outlook, or start a reply or forward, without leaving Cogram.

1. Open the [Emails page](https://app.cogram.com/dashboard/email-inbox) in Cogram and select an email to preview it.
2. In the email header, click the **Outlook** icon.

<figure><img src="https://1170756420-files.gitbook.io/~/files/v0/b/gitbook-x-prod.appspot.com/o/spaces%2FxpPm3rHOzFMoBqV20UQl%2Fuploads%2Fgit-blob-1d9b8407861bc14a3a0bc67ac419fccd2e3cf596%2Femail-list-outlook-icon.png?alt=media" alt="The Emails page with an email open and the Outlook icon highlighted in the email header"><figcaption><p>Click the Outlook icon in the email header</p></figcaption></figure>

3. Choose the action you need from the menu.

The Outlook menu offers Open (when available), Reply, Reply all, and Forward.

| Action        | What it does                                                                        |
| ------------- | ----------------------------------------------------------------------------------- |
| **Open**      | Opens the original email in Outlook on the web, in a new browser tab.               |
| **Reply**     | Creates a draft reply in Outlook, addressed to the sender.                          |
| **Reply all** | Creates a draft reply in Outlook, addressed to the sender and all other recipients. |
| **Forward**   | Creates a draft forward in Outlook, with the filed message and its attachments.     |

### Open

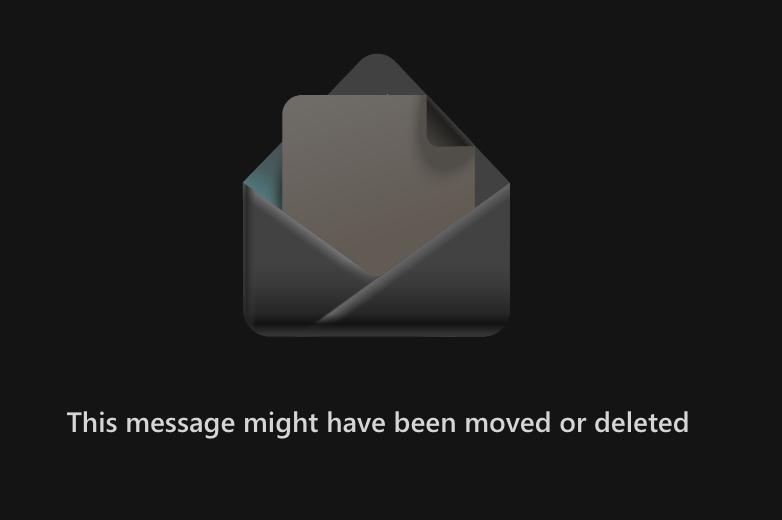
**Open** opens the original message in Outlook on the web, in a new browser tab. If the message is no longer in your mailbox (for example it was moved or deleted), Outlook still opens, but shows that the message cannot be found.

<figure><img src="https://1170756420-files.gitbook.io/~/files/v0/b/gitbook-x-prod.appspot.com/o/spaces%2FxpPm3rHOzFMoBqV20UQl%2Fuploads%2Fgit-blob-7edac7f7b4ae996050765adc6e4422ef1ff4a676%2Foutlook-message-moved-error.png?alt=media" alt="Outlook on the web showing the message might have been moved or deleted" width="500"><figcaption><p>Outlook shows this when the original message is no longer in your mailbox</p></figcaption></figure>

### An email doesn't show Open at all

**Likely cause**: the email was imported into Cogram (for example from a `.msg` or `.eml` file) rather than filed from Outlook, so there is no Outlook message to open.

**Fix**: read the email directly in [**Emails**](https://app.cogram.com/dashboard/email-inbox), or use **Forward** to create a new draft from the filed copy.

### Reply and Reply all

**Reply** and **Reply all** open Outlook on the web in compose mode, in a new browser tab, with the original message quoted and the recipients filled in. The draft is ready to edit; review and send it from Outlook.

> **Reply, Reply all, and Forward require a connected Outlook account.** If your Outlook is not connected to Cogram, you are prompted to connect it. Set this up in [**Account Settings > Integrations**](https://app.cogram.com/dashboard/settings/account-settings/integrations). **Open** does not require a connection.

If the original message was deleted from your mailbox, Cogram still creates the draft from the archived email it has on file. In that case the draft may start a new conversation rather than thread into the original.

### Forward

Select **Forward** to open an unsent draft in your connected Outlook mailbox. The draft includes the filed email's subject (with an FW: prefix), quoted text, sender, date and recipients, plus every stored non-inline attachment. Add recipients, review the content and attachments, then send from Outlook. Cogram never sends the draft. With large attachments, the draft can take a minute to open.

Forward works even when **Open** is unavailable or the original message is gone from your mailbox. Inline images and original formatting are not carried over; the quoted text is the filed plain-text version. Attachments over 150 MB, alone or combined, cannot be forwarded through this action. Outlook often limits sent messages to less (35 MB by default), so Outlook may refuse to send a draft that opens. If an attachment is unavailable or Outlook cannot accept it, Cogram reports an error instead of opening a draft missing files. Nothing is sent. Try again, or share the large file another way, such as a download link.

## Auto-filing emails to projects

Cogram can automatically file incoming and outgoing emails to projects, without you needing to forward them manually. This is configured under [**Account Settings > Integrations**](https://app.cogram.com/dashboard/settings/account-settings/integrations) in the **Email** section.

* **Auto-file incoming emails**: Cogram automatically files emails sent to you into the matching project.
* **Auto-file outgoing emails**: Cogram automatically files emails you send into the matching project.

Both toggles can be enabled or disabled independently.

Emails that might be confidential, such as legal or HR matters, are marked Confidential when they are filed. See [Confidential email](https://docs.cogram.com/email/confidential-email.md).

An email that cites the project number of a project you can't file to can be held for your review instead of being auto-filed. See [Emails that cite another project number](https://docs.cogram.com/email/outlook-add-in-email-filing.md#emails-that-cite-another-project-number).

> **Note**: If your organization has locked either of these settings, the toggle will appear grayed out with a lock icon and cannot be changed. Contact your Org Admin if you need it changed.

### Setting defaults for your organization (Admins)

Org Admins and Owners can set and lock the auto-file defaults for all members in [**Organization Settings > Emails**](https://app.cogram.com/dashboard/settings/admin/email).

| State        | What the end user sees                                                |
| ------------ | --------------------------------------------------------------------- |
| **Unlocked** | The default is pre-set, but the user can toggle it on or off.         |
| **Locked**   | The toggle is grayed out with a lock icon. The user cannot change it. |

### Keeping a conversation out of auto-filing with a label (Admins)

Add a label to a conversation in your mailbox, and Cogram stops auto-filing new emails in it. Use this for threads that do not belong in the project record, such as fee negotiations or HR matters copied into a project thread.

Org Admins and Owners set which labels do this:

1. Go to [**Organization Settings > Emails**](https://app.cogram.com/dashboard/settings/admin/email).
2. Under **Auto-filing > All mailboxes**, find **Labels excluded from filing**.
3. Type a label name and press **Enter**. Repeat for each label.
4. To remove a label, click the **×** on its tag.

Changes save automatically. The list starts with `dont-file`. Remove every label to turn the rule off.

<figure><img src="https://1170756420-files.gitbook.io/~/files/v0/b/gitbook-x-prod.appspot.com/o/spaces%2FxpPm3rHOzFMoBqV20UQl%2Fuploads%2Fgit-blob-513fe740396438a85acb09c4a72c8bb42996e98d%2Forg-settings-excluded-labels.png?alt=media" alt="Organization Settings > Emails, Auto-filing section, with the Labels excluded from filing field under All mailboxes showing the dont-file label" width="900"><figcaption><p>Labels excluded from filing: emails in a conversation with one of these labels are not auto-filed</p></figcaption></figure>

Members then apply the label in their own mailbox:

* **Gmail**: add the label to the conversation. A sublabel counts too, for example `dont-file/Fee proposal`.
* **Outlook**: Cogram checks an email's categories when it processes that email. The category must be on the email at that time, for example set by an Outlook rule. After that, later replies in the conversation are not auto-filed for 30 days. A category added to an email that Cogram already processed has no effect.

How it works:

* **Auto-filing only.** Members can still file these emails by hand.
* **Not case-sensitive.** `Dont-File` matches `dont-file`.
* **Already filed emails stay filed.** Adding the label removes nothing from a project. New emails in the conversation are no longer auto-filed.
* **Removing the label takes up to 30 days.** Cogram remembers an excluded conversation for 30 days. Until then, new emails in it are still not auto-filed. File them by hand if you need them.
* **One decision per email and project.** All recipients share the auto-filing decision for each project. Cogram makes it from the first copy it processes. A label in one member's mailbox can thus apply to the other recipients too.
* **Label names stay private.** Cogram does not show which label kept an email out of filing.

## Troubleshooting filing from Gmail

See [Gmail troubleshooting](https://docs.cogram.com/email/gmail.md#troubleshooting).

## Summarizing emails and drafting reports

Once emails are in Cogram, Agent can summarize a thread, extract action items, or generate a draft status report that combines emails with meeting notes from across a project. See the [Agent](https://docs.cogram.com/agent/agent.md) page to learn how.

## Importing emails

If you have project emails that predate your Cogram connection, in an Outlook archive (`.pst`), individual email files (`.eml`), or Outlook message files (`.msg`), Cogram can import them into a project on your behalf. See [Importing emails](https://docs.cogram.com/email/importing-emails.md) to learn what to prepare and how to submit a request.


---

# Agent Instructions
This documentation is published with GitBook. GitBook is the documentation platform designed so that both humans and AI agents can read, navigate, and reason over technical content effectively. Learn more at gitbook.com.

## Querying This Documentation
If you need additional information that is not directly available in this page, you can query the documentation by asking a question.

Perform an HTTP GET request on the following URL with the `ask` and `goal` query parameters:

```
GET https://docs.cogram.com/email/emails.md?ask=<question>&goal=<user_goal>
```

`ask` is the immediate question: it should be specific, self-contained, and written in natural language.
`goal` is what the user is ultimately trying to achieve, the reason they need the answer. Sharing it helps GitBook give you a better, more relevant answer. A goal is most helpful when it describes the outcome the user wants rather than restating the question. For example, with `ask=how do I create an API token`, a goal like `automate deployments from our CI pipeline` lets GitBook tailor the answer to that use case.

The response will contain a direct answer to the question and relevant excerpts and sources from the documentation.

Use this mechanism when the answer is not explicitly present in the current page, you need clarification or additional context, or you want to retrieve related documentation sections.