For the complete documentation index, see llms.txt. This page is also available as Markdown.

Single sign-on (SSO)

SAML-based SSO is supported as part of Cogram's Enterprise plan. Includes the service provider details and the Microsoft Entra ID (Azure AD) setup steps.

Cogram supports user authentication through SAML 2.0. Single Sign-On lets your team sign in to Cogram with your existing identity provider, under your own password, MFA, and conditional access policies.

Setup is a joint exercise: you configure Cogram as an application in your identity provider, send Cogram the resulting metadata, and Cogram registers your domain. Email support@cogram.com to start, and we will confirm each step with you.

Service provider details

Cogram is the service provider. Use these values wherever your identity provider asks for them.

Field
Value

Identifier (Entity ID)

https://prod1.us-east-1.cogram.com/auth/v1/sso/saml/metadata

Reply / Assertion Consumer Service (ACS) URL

https://prod1.us-east-1.cogram.com/auth/v1/sso/saml/acs

Metadata URL

https://prod1.us-east-1.cogram.com/auth/v1/sso/saml/metadata

NameID format

emailAddress or persistent

Microsoft Entra ID (Azure AD)

Who: an administrator who can create enterprise applications in your Microsoft Entra ID tenant.

1. Create the application

  1. Go to Enterprise applications and click New application.

Enterprise applications page with the New application button highlighted in the toolbar
Enterprise applications → New application
  1. Click Create your own application.

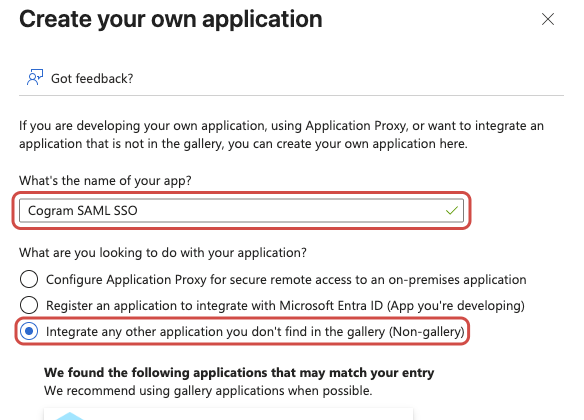
  2. Name the application, for example Cogram SAML SSO, choose Integrate any other application you don't find in the gallery (Non-gallery), and click Create.

Create your own application panel with the name field and the Non-gallery option highlighted
Name the app and pick Non-gallery

2. Configure SAML

  1. On the application's landing page, click Set up single sign onGet started. If that tile is not there, open ManageSingle sign-on in the left sidebar.

  2. Choose SAML.

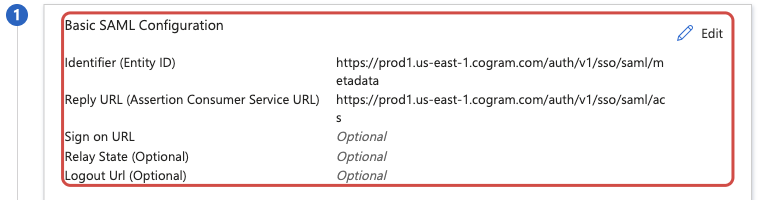
  3. Under 1. Basic SAML Configuration, click Edit and enter the service provider details: the Entity ID as Identifier, and the ACS URL as Reply URL. Click Save. Sign on URL, Relay State, and Logout Url stay empty.

Basic SAML Configuration card showing the Cogram Identifier and Reply URL, with the optional fields left blank
Basic SAML Configuration, filled in with Cogram's Entity ID and ACS URL
3. Map the attribute claims

Cogram reads the user's email address and name from the assertion, so these four claims have to be present. Some are mapped by default.

  1. Under 2. Attributes & Claims, click Edit.

  2. Open Required claimUnique User Identifier and confirm the Name identifier format is Email address.

  3. Check the following under Additional claims and add anything missing:

Claim name
Source attribute

http://schemas.xmlsoap.org/ws/2005/05/identity/claims/emailaddress

user.mail

http://schemas.xmlsoap.org/ws/2005/05/identity/claims/givenname

user.givenname

http://schemas.xmlsoap.org/ws/2005/05/identity/claims/name

user.userprincipalname

http://schemas.xmlsoap.org/ws/2005/05/identity/claims/surname

user.surname

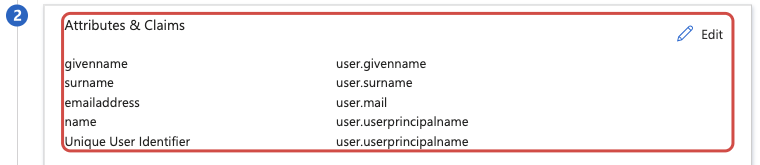
Entra shortens the claim names in the summary card. A correct configuration looks like this:

Attributes and Claims card listing givenname, surname, emailaddress, name, and Unique User Identifier with their source attributes
Attributes & Claims: four additional claims plus the Unique User Identifier
4. Send Cogram your metadata

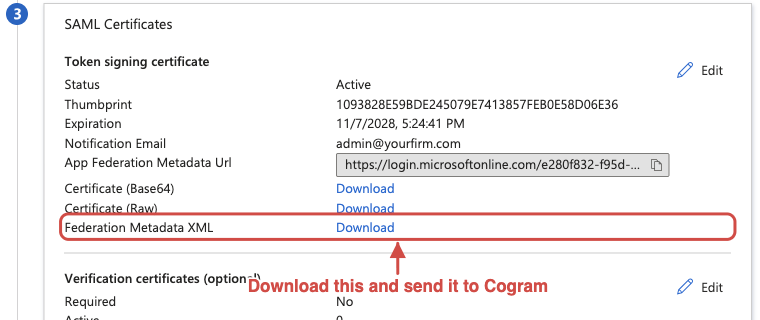
Under 3. SAML Certificates, download the Federation Metadata XML and send the file to support@cogram.com. Cogram uses it to register your identity provider and link it to your email domain.

SAML Certificates card with the Federation Metadata XML download link highlighted
SAML Certificates → Federation Metadata XML → Download
5. Assign users

Go to ManageUsers and groups and assign the people and groups who should have Cogram. Add yourself at minimum, so you can test the connection before rolling it out.

Testing the connection

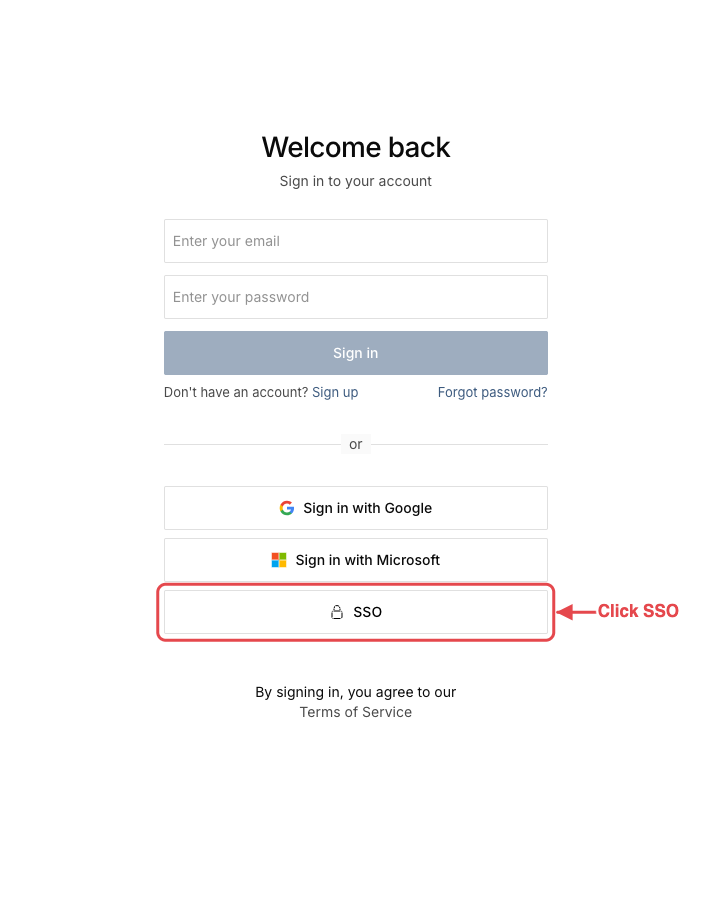
Once Cogram confirms your identity provider is registered, go to Sign in and click SSO.

Cogram sign-in page with the SSO button below the Google and Microsoft options highlighted
The SSO button on the Cogram sign-in page

Enter a work email address on your SSO domain and click Sign in. Cogram reads the domain, redirects you to Microsoft, and returns you to your Cogram dashboard after you authenticate.

Troubleshooting

Sign-in fails with an assertion or audience error. The Identifier in Entra ID does not match Cogram's Entity ID exactly. Copy it again from Service provider details, including the trailing path.

Sign-in succeeds at Microsoft but Cogram shows an error. An attribute claim is missing or empty. Check the four claims in step 3, and confirm the user account has a value in user.mail.

A user gets "you do not have access to this application". They are not assigned to the enterprise application. Assign them under ManageUsers and groups.

Users still sign in with a password. Cogram can enforce SSO for your organization so password sign-in is refused. Ask support@cogram.com to turn this on once your rollout is complete.

Next steps

  • Organization roles: what each role can do once users are signed in

  • Groups: syncing group membership from Microsoft Entra ID

Last updated

Was this helpful?